
3D Pen Tutorial: Christmas Ornament
This post may contain affiliate links. As an Amazon Associate, I earn from qualifying purchases.
Welcome to the festive world of 3D pen creativity! In this tutorial, we’ll embark on a jolly journey to craft unique Christmas ornaments using the versatile magic of a 3D pen. Whether you’re a seasoned artist or a curious beginner, this step-by-step guide will walk you through the process of bringing your custom holiday decorations to life. So, grab your 3D pen, and let’s add a touch of personalized charm to your Christmas tree this season.

Watch our Instructional Video
Excited to dive into the nitty-gritty of crafting your own 3D pen Christmas ornament? We’ve got you covered! In our step-by-step video tutorial, we’ll guide you through the entire process, making it easy for you to follow along and create a personalized masterpiece. Whether you’re a visual learner or prefer reading through the steps, we’ve got options for everyone. Feel free to watch the video for a hands-on experience, or if you prefer a written guide, keep scrolling through this blog article for detailed instructions on how to bring your custom ornament to life. Let the crafting festivities begin!
Materials You’ll Need
Before we delve into the step-by-step guide, let’s gather the materials required for this project:
- A 3D pen (we used the SCRIB3D P1)
- 3D pen filament (We used Green PLA and Flashforge Red PLA)
- A laminator or packing tape
- A dry erase marker
- A flat, heat-resistant surface
- A safe workspace
- A ornament hook or string
- The 3D pen stencil included at the end of this tutorial
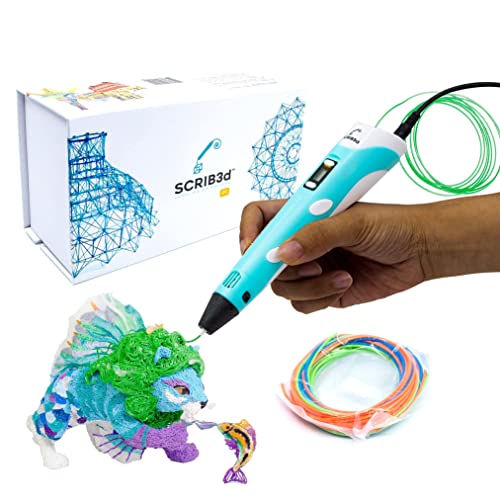
- [FOR CREATIVE PROJECTS] Create, draw, doodle, and build in 3D with this versatile, high-quality 3D pen. The SCRIB3D P1 enhances spatial thinking, creativity, and artistic skills. Ideal for collaborative projects, handmade creations, decorations, or everyday repairs. The P1 features a stepless speed function for precise control, whether working on detailed designs or faster infill tasks.
- [READY-TO-USE KIT] Includes 3 colors (30 feet) of PLA plastic to keep you Doodling for ages, as well as a power adapter, step-by-step manual, and a free stencil guide. Just plug in, heat it up and enjoy the fun of creating three-dimensional masterpieces. PLA is a versatile, easy-to-use printing plastic that is great for both first time and advanced users.
- [BEGINNER FRIENDLY] Plug the adapter into the back of the pen and choose your filament. The red light will turn on indicating warm up, this will take about 2-3 mins. Double click the forward button to start and feed the filament through the back of the pen. Once the filament has reached the nozzle of the pen, click forward to stop. Press and hold the forward button or double click for a continous flow. Once you have completed your design, press and hold the reverse button to retract filament.

- Compatibility: 1.75mm diameter filament is compatible with SCRIB3D P1/ADV, MYNT3D Basic/Super/Pro, Pika3D Super/Pro
- Incompatible Models: Please note that YEETIN filaments are incompatible with the following 3D pen models: Scrib3D Junior, Mynt3D Junior, Pika3D Junior, 3Doolder Create/Create+/Pro+/Start/Start+
- Refills Compatibility: The 1.75mm diameter filament is compatible with SCRIB3D P1/ADV, MYNT3D Basic/Super/Pro, 3Doodler Flow/Pro
No products found.
No products found.
Step 1: Prepare the Workspace
Set up a clean and safe workspace for your learners. Ensure you have a flat surface, and consider using a mat or a large piece of cardboard to protect the workspace from any potential hot 3D pen mishaps.
Step 2: Laminate or Tape the Stencil
Make sure the stencil is ready for use. Laminate it or cover it with tape to make it more durable and suitable for working with a 3D pen. This step will make it easier to pull your design off the paper.
Step 3: Design your ornament
Give each student a laminated or taped ornament stencil. Students can add their own details to the blank ornaments with a dry-erase marker. We recommend using a large block letter to customize your design.
Step 4: Outline the Letter
Outline your custom design and fill it in using back-and-forth strokes across the design. Watch our video for a visualization of this.
Step 5: Outline and Fill the Ornament.
Choose a different PLA color to outline your ornament and fill in the shape by moving the pen back and forth across the paper just like how you would color in a coloring book.
Step 5: Attach a string or hook to your ornament.
Attach a string or hook to your ornament so it’s ready to hang on the tree!
First time using a 3D Pen? Check out our beginner tutorial!
Grab the Stencil Here

Pin For Later!
In just a few steps, you’ve transformed your 3D pen into a festive tool for creating one-of-a-kind Christmas ornaments. Whether you followed along with our video tutorial or read through the detailed instructions, we hope you enjoyed the crafting process. Now, proudly hang your custom creation on the tree and let it sparkle with the joy of handmade holiday magic. Happy crafting and happy holidays!

Kate is mom of two rambunctious boys and a self-proclaimed super nerd. With a background in neuroscience, she is passionate about sharing her love of all things STEM with her kids. She loves to find creative ways to teach kids computer science and geek out about coding and math. She has authored several books on coding for kids which can be found at Hachette UK.


![3D Pen Tutorial [Step By Step Guide]](https://teachyourkidscode.com/wp-content/uploads/2022/11/Horizontal-Printable-Templates-3-768x512.png)
